I like sharing data between PC and C64 using old methods. So yes, I am still using real Commodore 1541s – and that asks for old floppies, of course (luckily, I still have many of them). This way, I can test new C64 releases (games and demos in particular) using real hardware. Demos on most cases do require a real 1541 disk drive unit or an excellent device emulating it. The 1541 Ultimate is known to run all C64 demos, but it is quite expensive (at least for my pockets). On the other hand, SD based devices are cheap, but they cannot run all demos successfully.
So, if you own some good floppy disks for the 1541, and your 1541 disk drive is still working fine, you just need an old PC running Windows XP with a parallel port, an XM1541 cable (or XA1541 cable), and the software OpenCBM. This is the setup I am currently using for transfers. Of course, other options are available. For instance, there are Commodore transfer cables that allow you to use an USB port on the PC side, instead of the parallel port. The device ZoomFloppy is also available. But, I will just talk about my current setup.
My modded PC for Commodore transfers
For a few euros, I got this nice PC at the flea market. It is an Athlon 64bit 3000+ system with 512 Mb of RAM and Windows XP. Quite underpowered for general use, but perfectly OK for what I have to do with it.

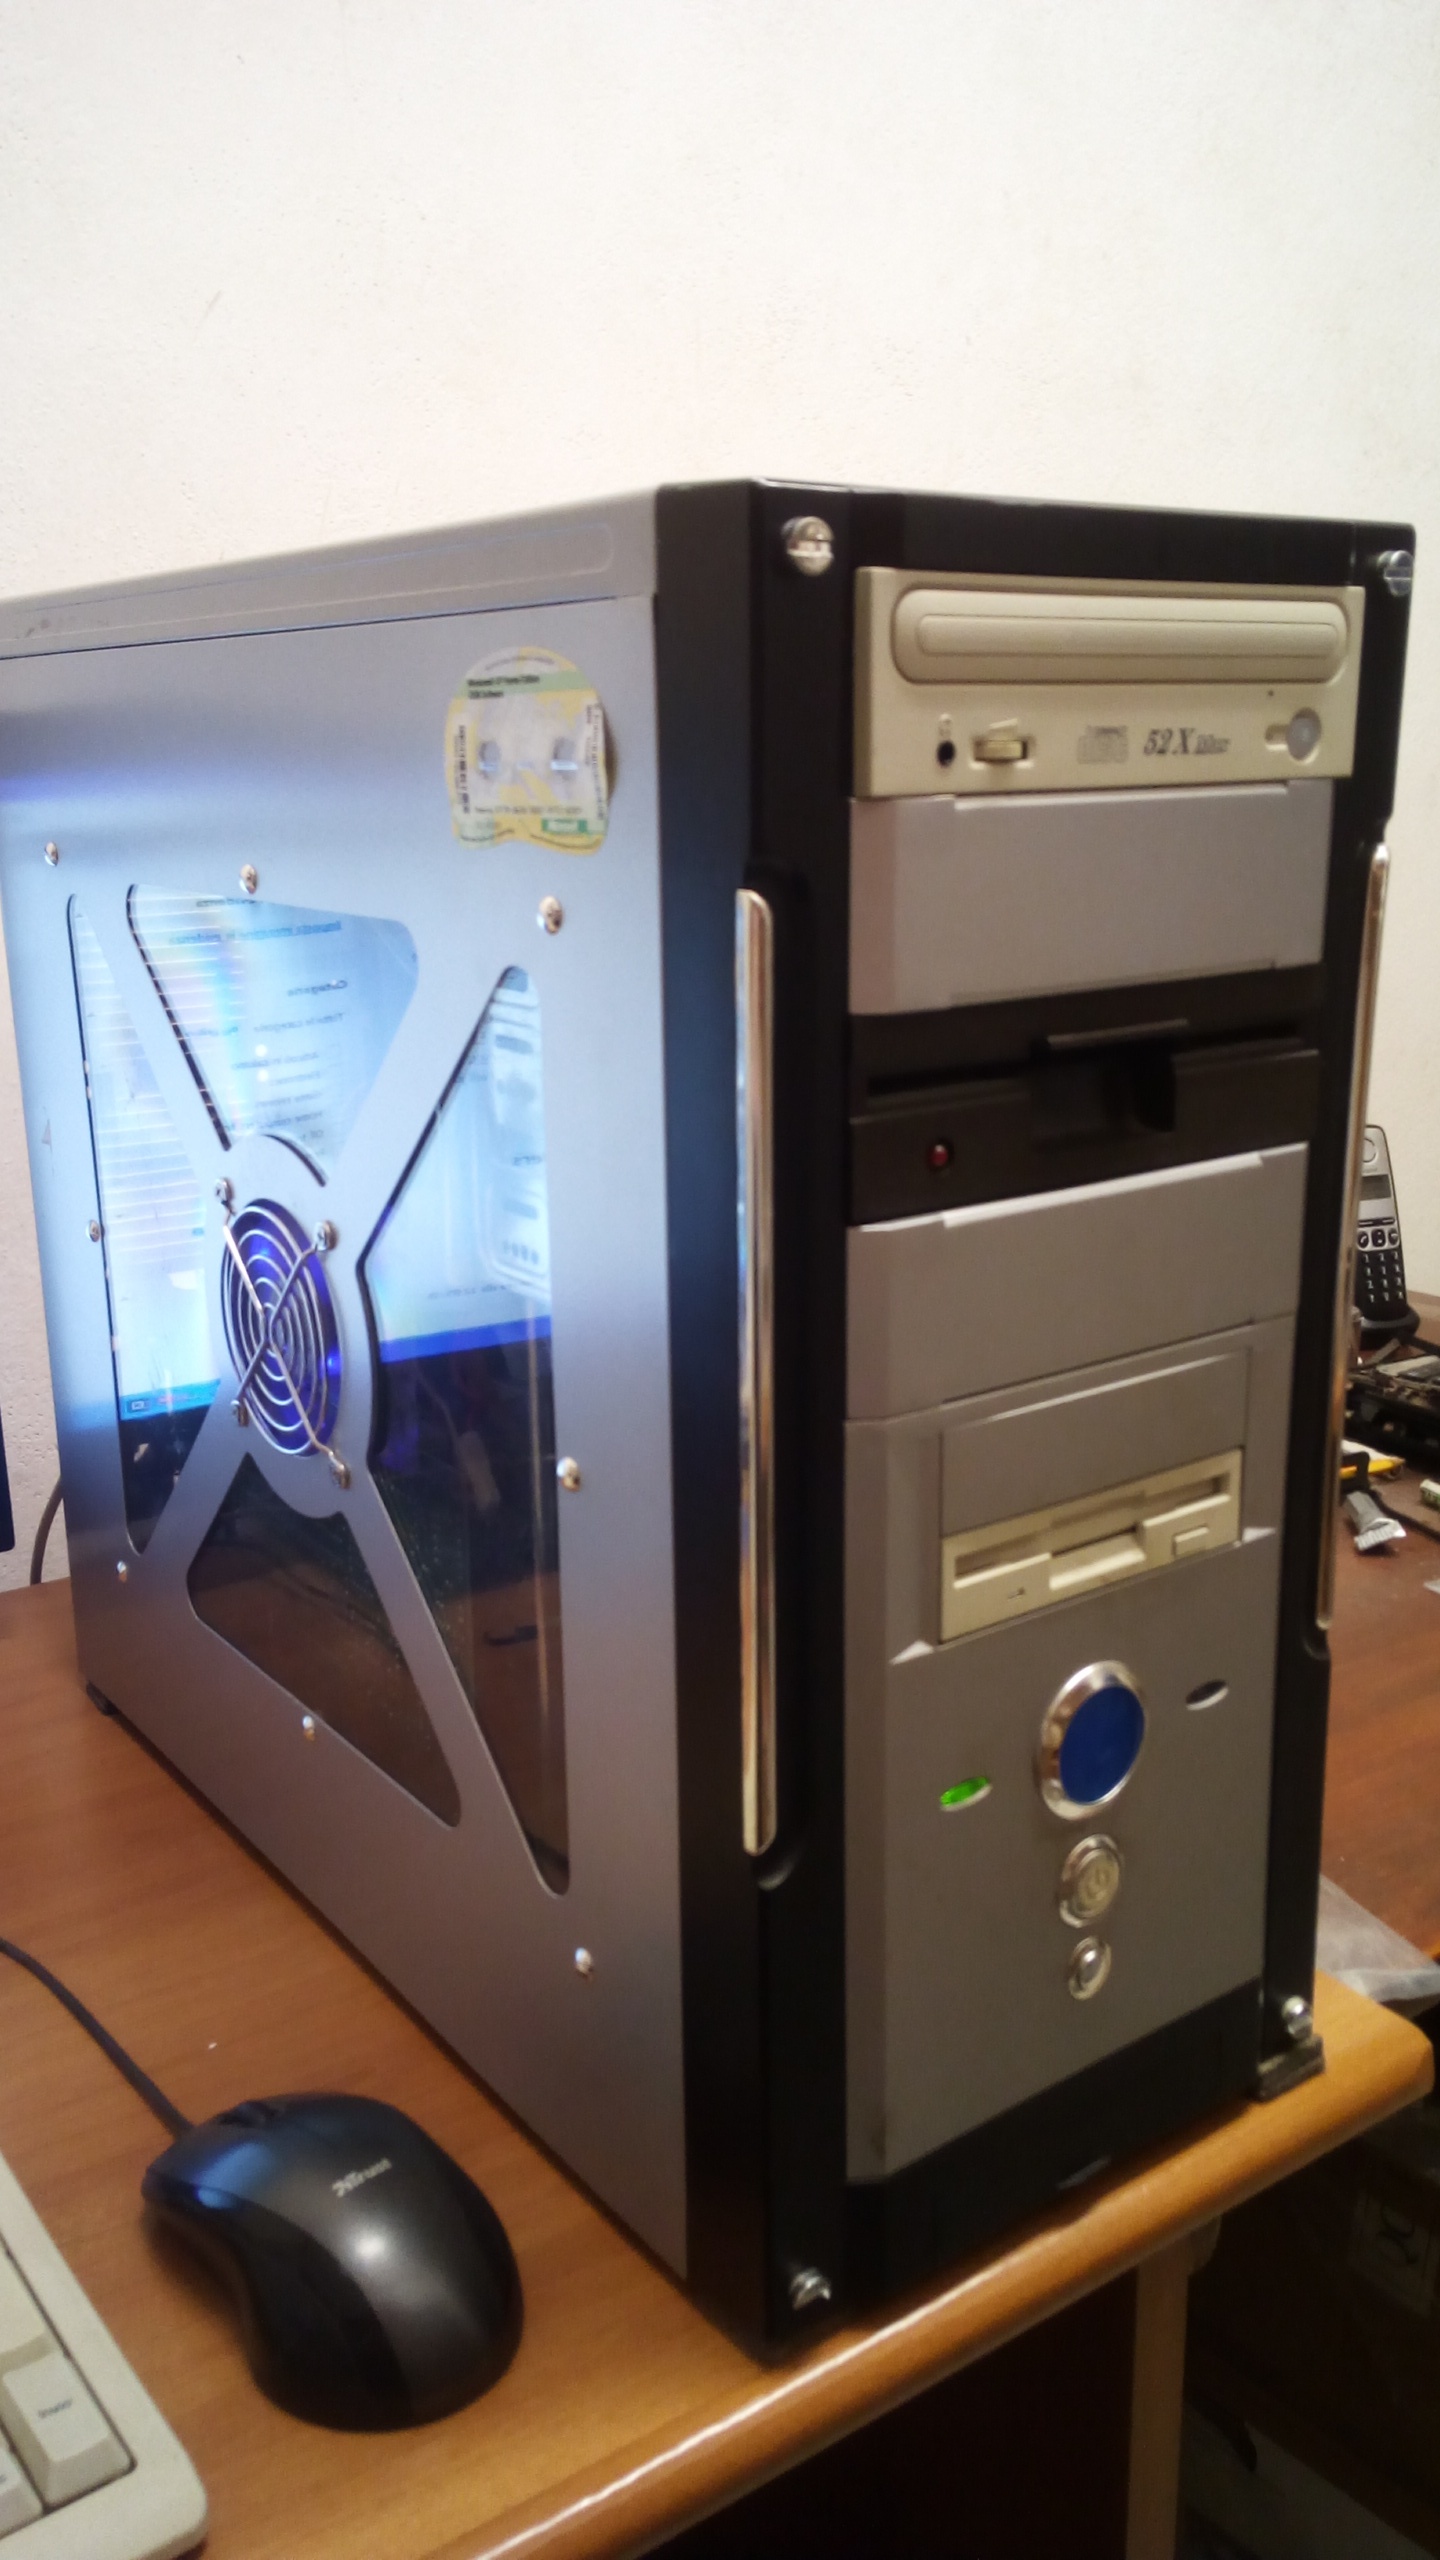
As you may have noticed, I have installed a 1541 mechanics on the PC, and also a 1541 board. This way, I have a compact setup for transferring .d64 files.
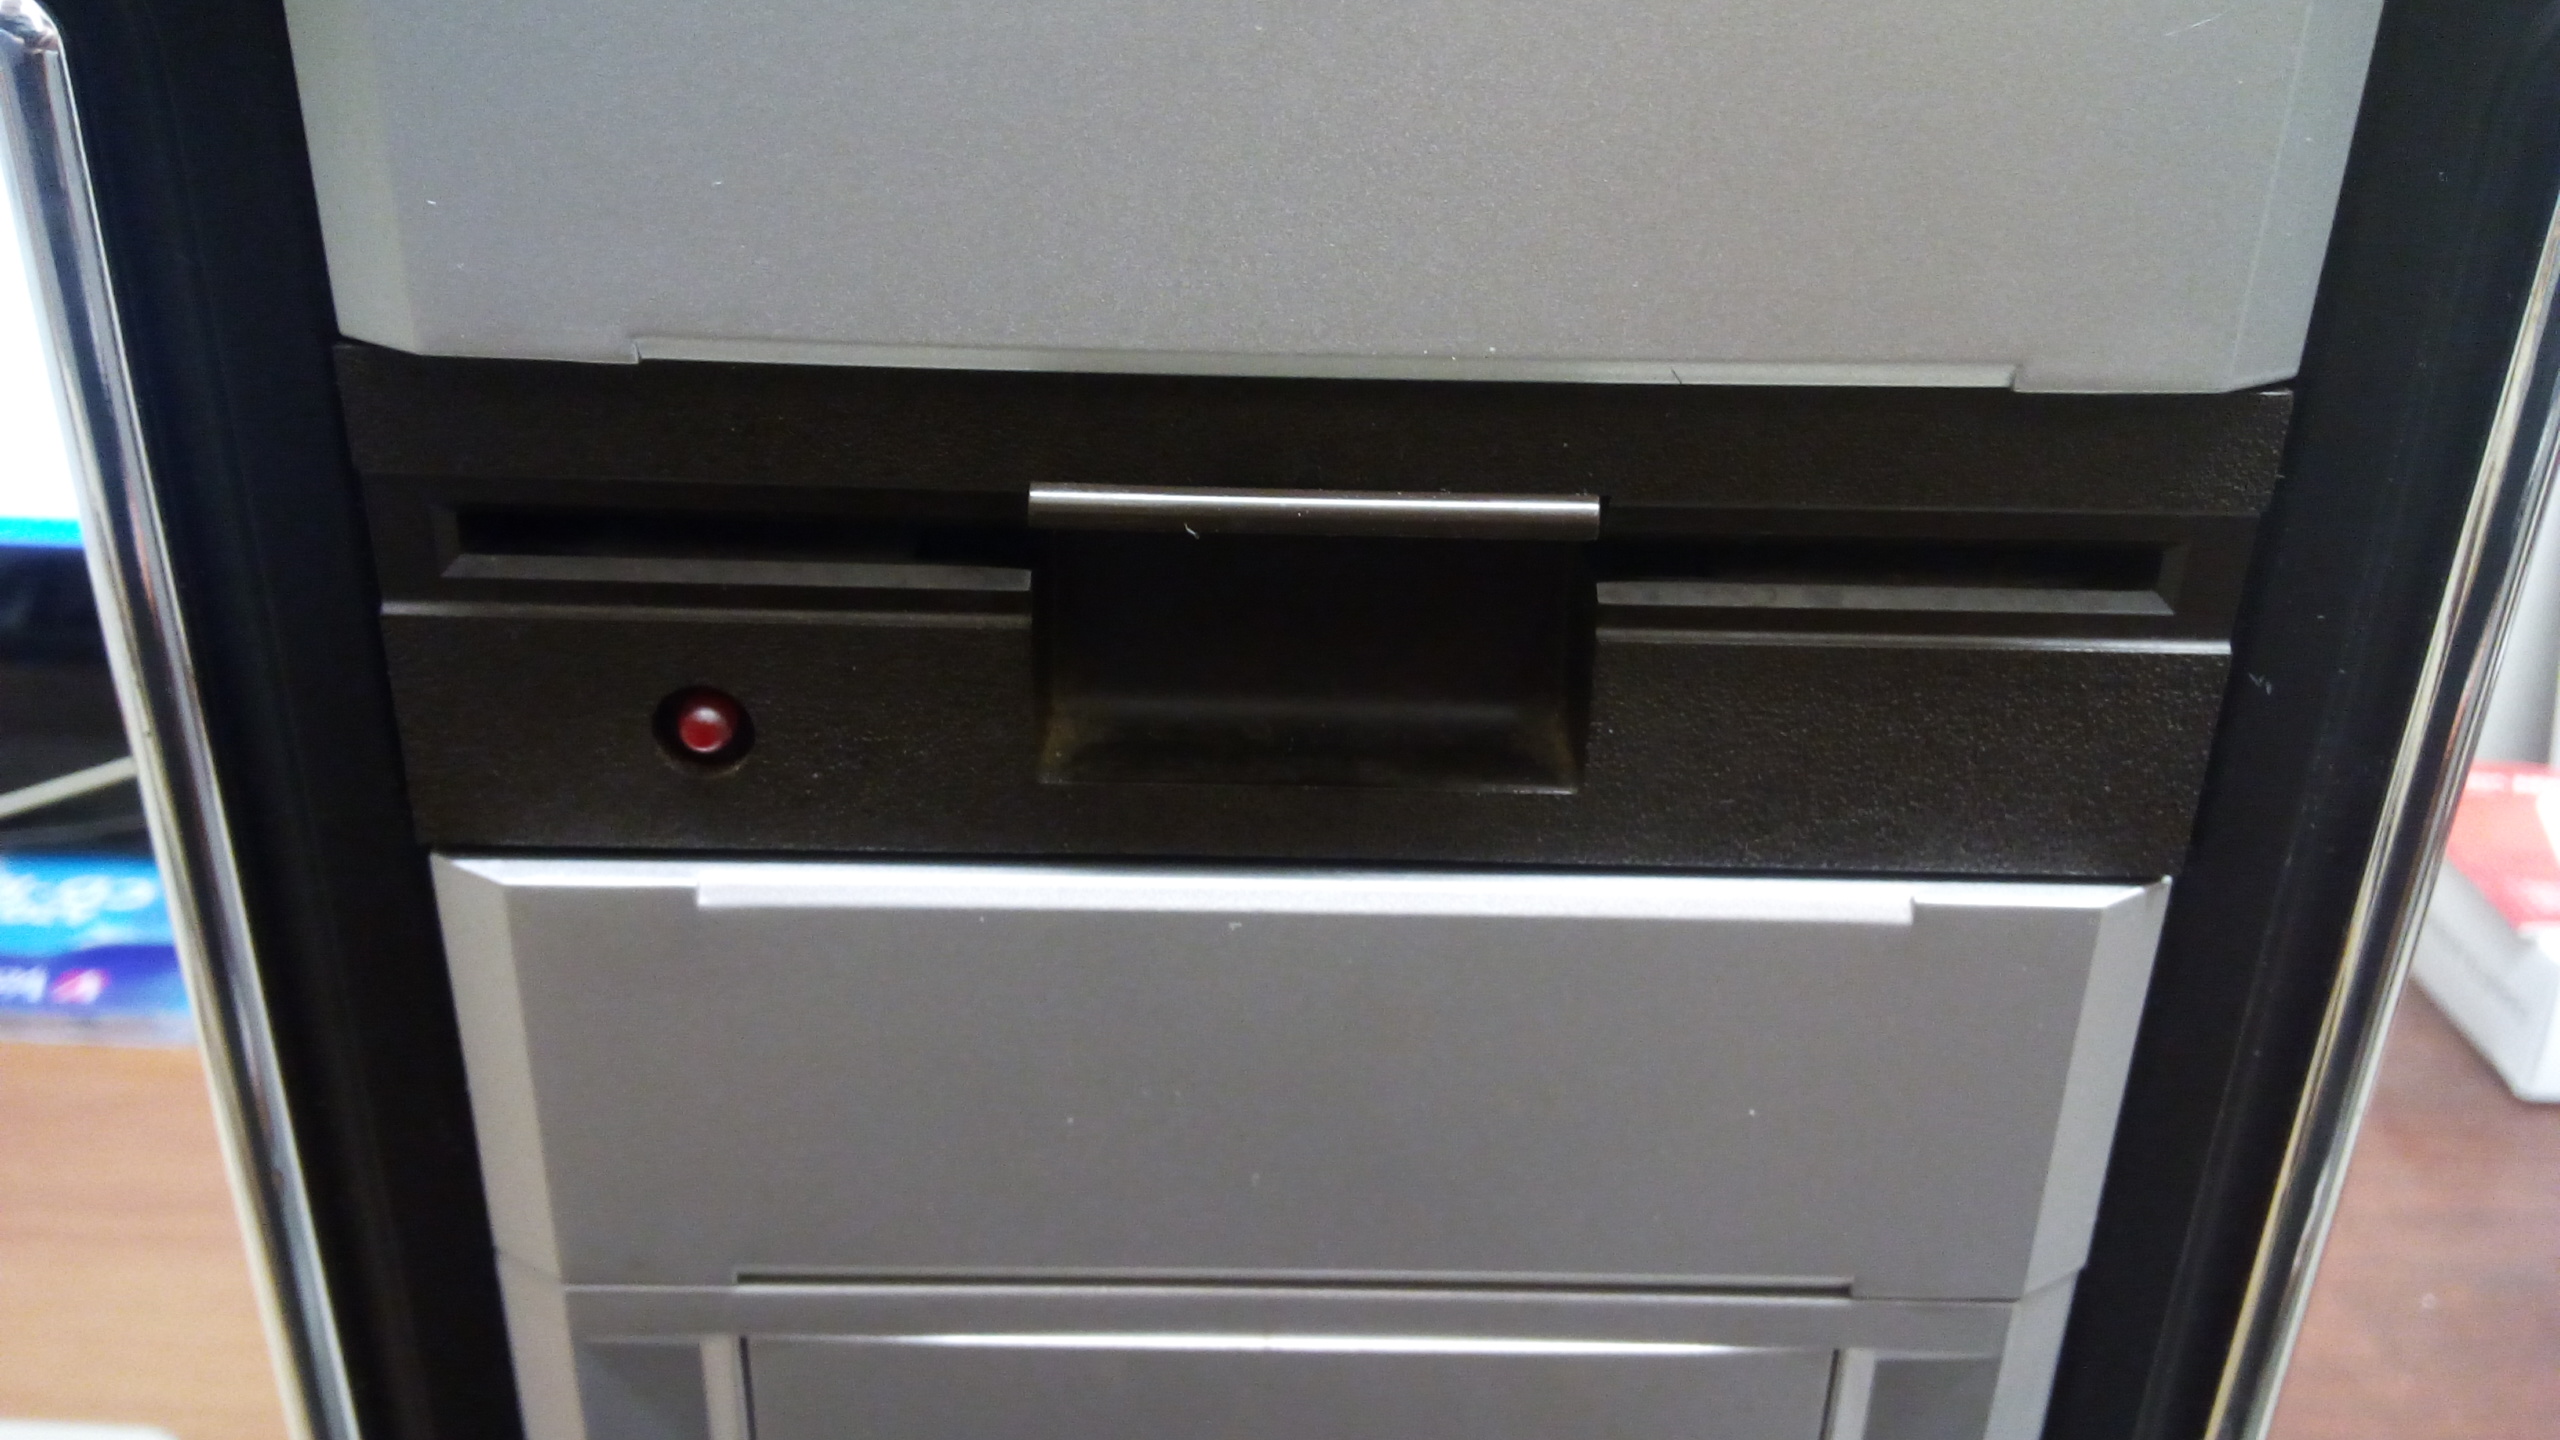
I took the board and the mechanics from an old brown 1541. I couldn’t use a 1541-II, as its mechanics wouldn’t fit on the PC case. Mechanics of older 1541s seem to fit just nicely on the PC case supports for CD-ROM units.
I have modded the 1541 board so that it is now powered by the PC PSU.

Now, let’s have a look at how to use the software for transfers. On another post, after I’ll be sure that everything works fine, I’ll explain how to mod a 1541 board so that it can be powered from an external supply.
Using OpenCBM
OpenCBM can be downloaded from this site. At the time being, you have to scroll down the page quite a bit to get to the download section.
It is a command-line based utility. It is actually made up of several utilities, that you can use from the Windows command prompt. For instance, the utility cbmctrl is used for tasks like resetting the 1541 or reading the directory of a disk. The utility d64copy is used for transferring .d64 files on a 1541 floppy disk, or to create .d64 files starting from a 1541 floppy disk.
But, the software GUI4cbm4win is also available. It is a GUI interface the allows simpler use of the OpenCBM utilities. It can be downloaded from here. Please note that this is just a GUI, not a complete utility, and it must be used along with the OpenCBM files. It will provide you with an easy to use point-and-click interface, much better than having to deal with a command line.
How to install OpenCBM
First of all, you need a Commodore 1541 disk drive, an XM or XA 1541 cable (if your PC has a parallel port), and a PC running Windows (I am using Windows XP on my setup for Commodore transfers).
Please refer to the official documentation for installation method. I am just telling you the way I installed the software. It works well for me, but it may not be the right method.
With both your 1541 and your PC turned off, connect them together using your XM1541 or XA1541 cable. Then, turn on your 1541 disk drive, then your PC. Don’t connect/disconnect anything when any device is turned on, otherwise you may damage your equipment.
After downloading openCBM, you will have the following content.
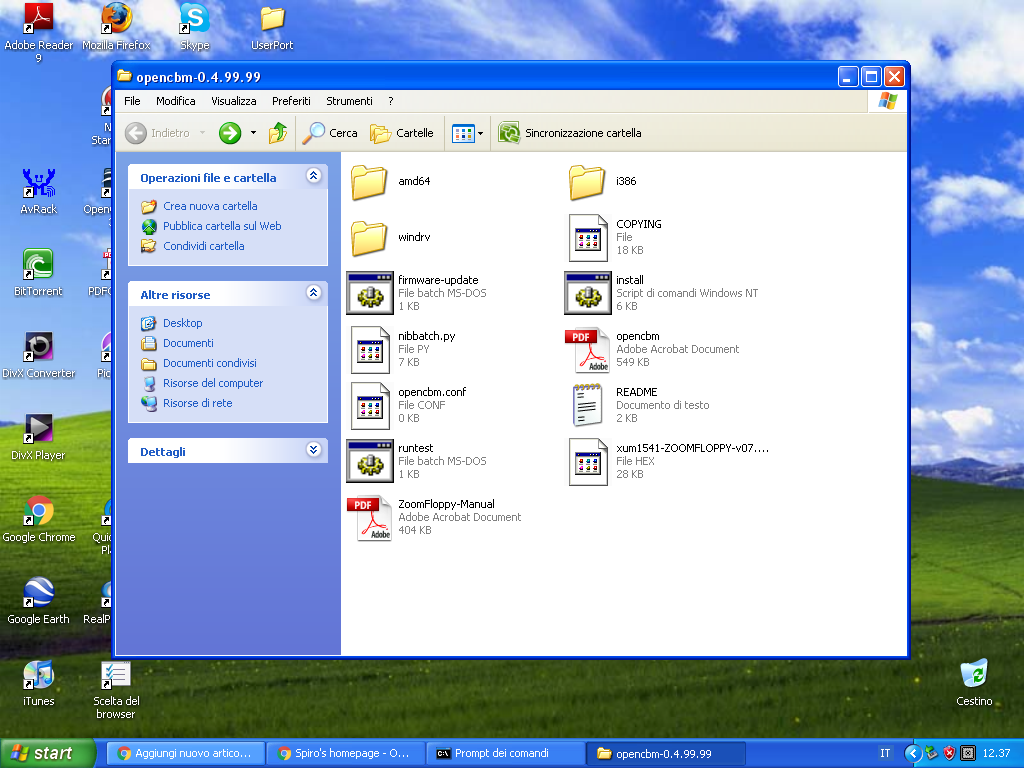
Select the folder amd64 or i386 according to the version of Windows you have. Please note that I have a 64bit AMD CPU, but I had to use the programs in the folder i386 as I have a 32bit version of Windows on this machine.
Copy the desired folder somewhere in your hard disk. Then, access to that folder using the Windows command prompt.
As this point, you need to install the software. For an XM1541 cable, use the command:
instcbm xa1541 --cabletype=xm1541
If you have an XA1541 cable, simply use:
instcbm xa1541
Now, if you get the message “No problems found in current configuration”, the installation should be fine.
Some tests can be performed to be sure that the installation is correct.
Enter the command:
cbmctrl reset
The 1541 drive should perform a reset (the red light should turn on, the drive should keep spinning for a couple of seconds, then the red light should turn off).
Now, issue the command:
cbmctrl status 8
You should get info on your Commodore drive, like the DOS version and the drive model.
Then, issue that command again. Now, you should get the message:
00, OK,00,00
Now, issue the command:
cbmctrl detect
You should get device number and drive model.
Other tests may be performed, but these should be enough to be sure that at least your Commodore drive is properly connected to your PC and that they can communicate somehow. You may have a look at the official documentation for further tests.
We will not bother with the command line any more, as we will be using GUI4cbm4win.
Using GUI4cbm4win
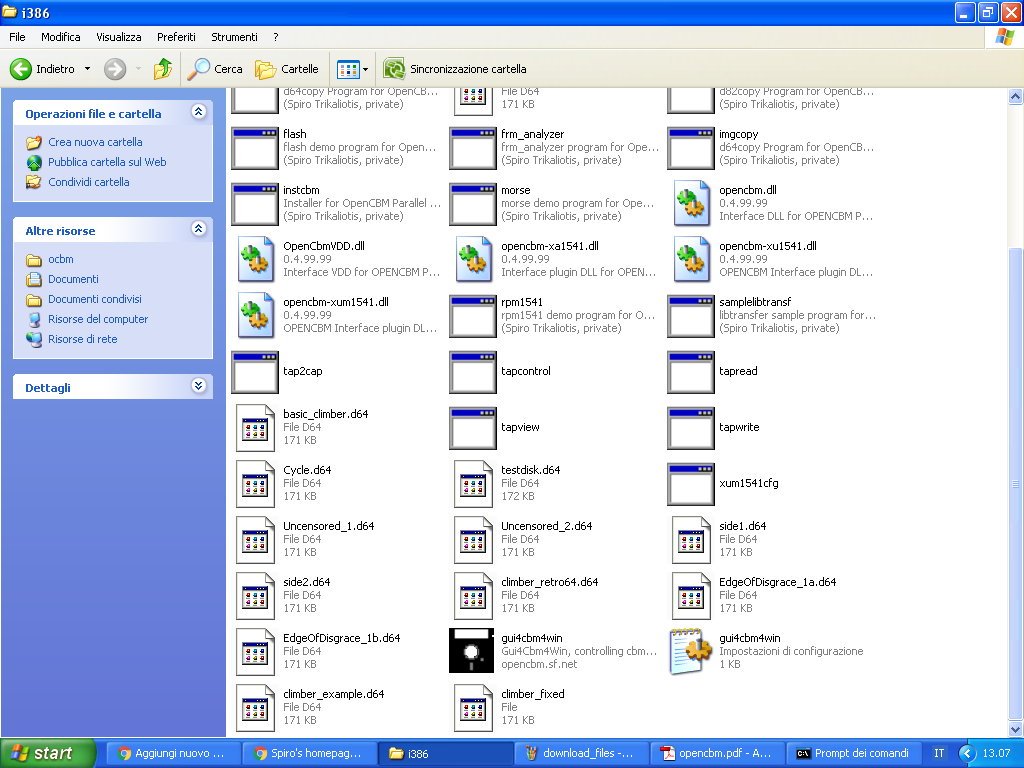
Go to the folder you have previously downloaded, take the file GUI4cbm4win (the file with a black floppy disk icon), then place it on the folder where you have OpenCBM.
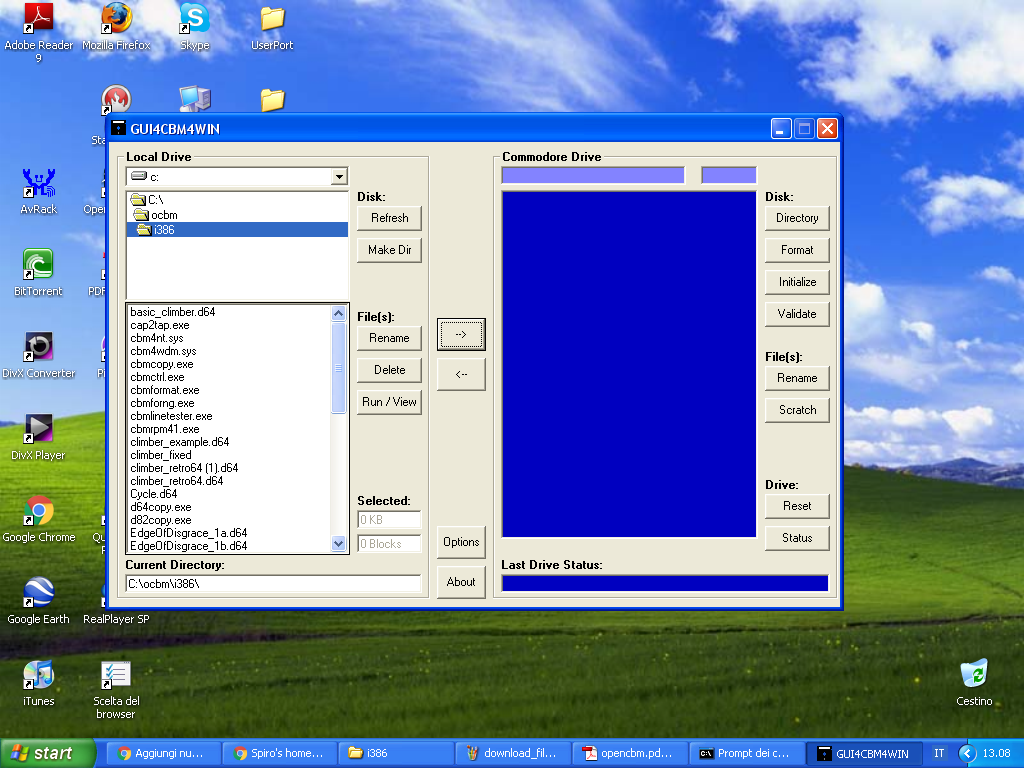
You should now have a folder more or less like this:
Now, try to double click on the floppy disk icon. If all goes well, you should get the following window:
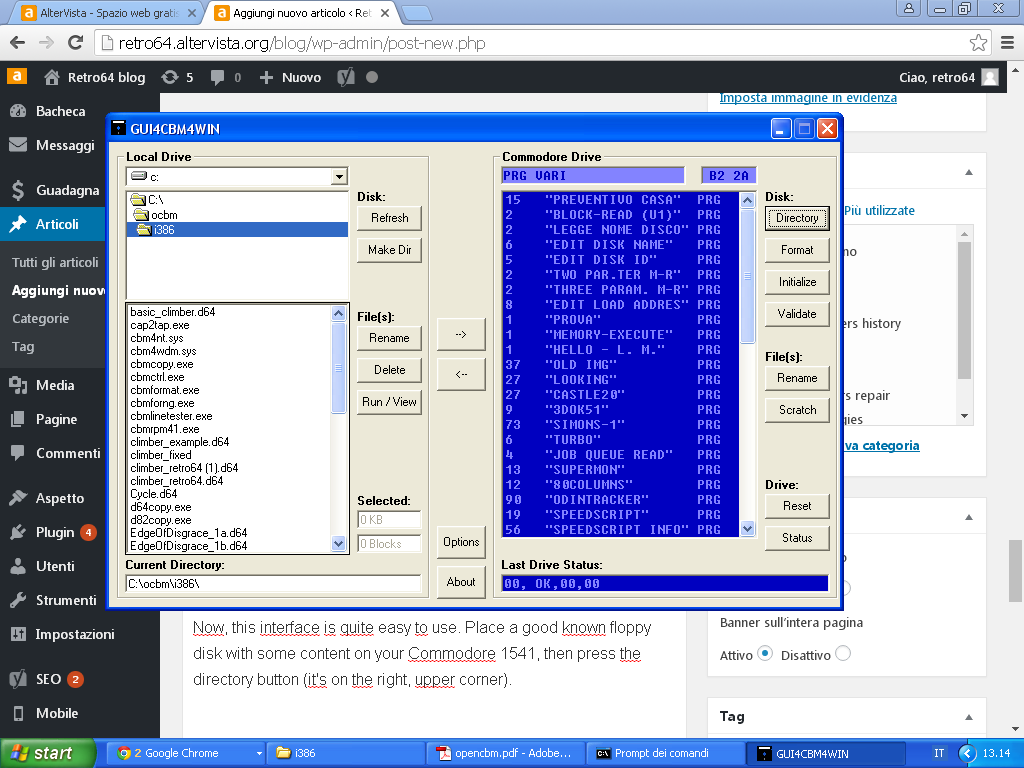
Now, this interface is quite easy to use. Place a good known floppy disk with some content you don’t care of on your Commodore 1541, then press the directory button (it’s on the right, upper corner). You should get the directory of your disk.
Now, if you want to create a .d64 disk image of your floppy, just press the LEFT arrow button (it’s to the center of the GUI window).
A message will appear, asking you if you want to create a .d64 file. Answer YES. Now, type the name of the .d64 file, including the extension.
Of course, be careful not to click on the wrong arrow, otherwise you risk to delete your disk (that’s why I am suggesting to use a floppy disk with no important content at the beginning).
At this point, a .64 file will be created on the folder you are using. Check it on an emulator. It should contain the same files as those on your floppy disk.
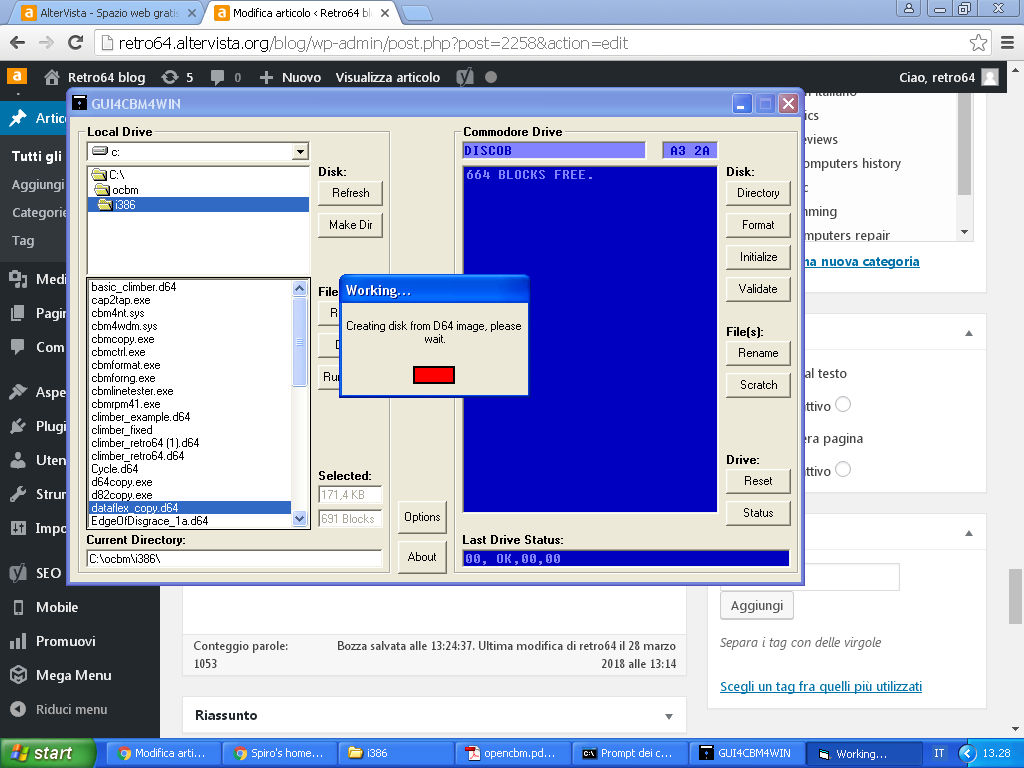
Now, place an empty floppy disk (or a floppy with useless content) on your Commodore drive. You may press the FORMAT button to format it (if it is not formatted already). Then, select a .d64 file from the left part of the GUI window (place a .d64 at your choice in the OpenCBM folder if there isn’t any, or on the folder you are using for transfers), then press the RIGHT arrow button to the center. Confirm with YES. At this point, the content of the .d64 image will be transferred on the floppy disk.
So, transferring from PC to C64 and vice-versa is very easy. The transfers enjoy an acceptable speed and seem to be quite reliable. Star Commander was faster (I was using it on an older PC that no longer works), but needed pure DOS to be reliable. That made everything more complicated. With the ability to use Windows for transfers, things are easy. You can just download a .d64 file from the web and transfer it on a floppy disk within the same working session. No need to re-boot your system on MS-DOS to make the transfer.
Very cool. I actually did the same thing myself, but with a 1541-II, back when I was using a Celeron PC, around 2006 🙂 I had the drive mainboard insulated with a piece of cardboard, very crude, but got the job done (it was a small form factor pc). Good to know others had the same idea! When I finished with that PC, I had the drive internals sitting in a box for many years, doing nothing. Only just last year I reassembled the drive into another 1541_II shell from my spare parts. I had since lost the drive brackets that suspended the drive mechanism in the plastic case, so I hacked some out of some metal from an old sacrificed PC case.